If you're new here, you may want to subscribe to my RSS feed. Thanks for visiting!
Author of Be Ready for Anything and Bloom Where You’re Planted online course
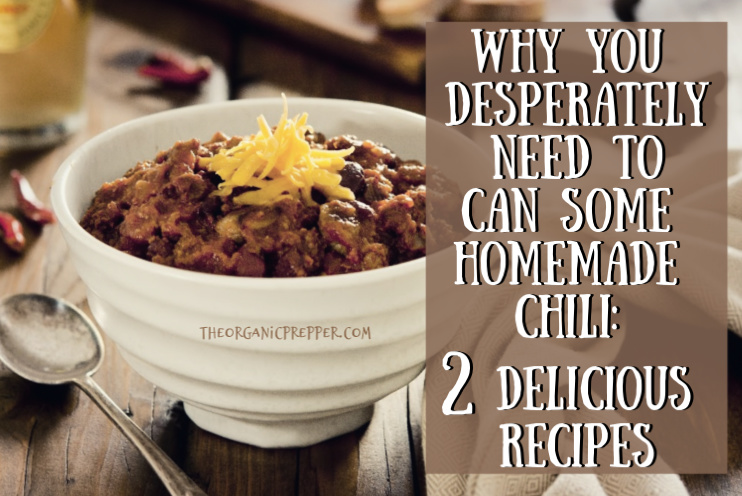
Do you love homemade chili? You can make it ahead of time and preserve it so that all you have to do is pop open a jar with these two recipes from my book The Prepper’s Canning Guide.
Chili is the perfect meal for a snowy winter day. The recipes that follow provide two very different takes on the traditional chili and are both enormously popular at our house. They are assembled using the layering method and are raw-packed, making it simple to create up to 7 family dinners at one cooking session. (Or more if your canner will hold it!)
Homemade canned chili is far more nutritious than storebought canned chili.
Another great thing about chili is the nutritional value: it’s loaded with protein, vitamins, and fiber.
The canned chili that you get from the grocery store generally contains lower quality meats, the least expensive vegetables available, and relies on artificial flavors and chemicals like MSG for its taste. If you want a heat-and-eat meal, home canned chili makes a far better addition to your pantry.
Remember, these recipes contain meat and vegetables that must be pressure canned to be safe. No matter how often you hear about people using the water bath process to can chili, it is not safe and can cause botulism, a potentially deadly illness. It’s really not worth the risk.
Tips for Perfect Home-Canned Chili
If you follow these tips, your chili will turn out perfectly.
- Soak the beans ahead of time and they will cook perfectly during the canning process.
- Feel free to take liberties with the ingredients, using whatever you are able to source healthfully. The seasoning is the important part!
- Raw pack all of the ingredients and load the jars using the layering method.
- The chili will thicken as it sits on the shelf. You may need to thin it with a small amount of water or tomato juice at serving time.
So…pick one of the recipes below and break out the pressure canner!
Mexican-Texican Cowboy Chili
This is the classic savory chili, loaded with meat and beans.
Ingredients:
- 4 pounds ground beef/ground turkey/ground whatever
- 1 cup diced onion
- 4 cloves minced garlic
- 2 pounds dried pinto beans
- 1 cup diced bell pepper
- Jalapeno peppers as desired
Liquid:
- 10 cups crushed tomatoes/tomato juice
- 1 can of beer (or water if you don’t have beer on hand)
- ½ cup chili powder
- 8 tablespoons of cumin
- 1 tablespoon of salt
- 1 tablespoon of parsley
- Water as needed
Directions:
- In a stockpot, bring all liquid ingredients except for water to a boil.
- Meanwhile, layer your meat, dried beans, onions, garlic, and bell pepper evenly across your jars – this will make about 6 quarts of very thick chili.
- Pour your hot liquid mixture over the layered ingredients, then top off with water, leaving an inch of headspace.
- Process your chili at 10 pounds of pressure for an hour and a half in your p-canner. Be sure to adjust for
Sweet & Spicy Chili
This recipe is a little bit different but if you’re a fan of sweet and savory dishes, you’ll love it. Minus the jalapenos (at least in my world!) this is a very kid-friendly flavor.
Ingredients:
- 4-6 pounds stewing beef/stewing whatever (You can also use ground meat if you prefer)
- 1 slice bacon per jar
- 2 large onions, diced
- 6 cloves garlic, minced
- 1 tablespoon of sea salt
- 3 cups of dried red kidney beans
- 1 cup bell pepper, diced
- Finely minced jalapeno pepper to taste
Liquid:
- 8 cups tomato puree
- ½ cup apple cider vinegar
- ½ cup brown sugar or molasses
- ½ cup chili powder
- 1 teaspoon dry mustard
- Water as needed
Directions:
- In a stockpot, bring all liquid ingredients except for water to a boil.
- Layer your raw meat, dried beans, bacon, onions, garlic, and bell pepper evenly across your prepped jars.
- Pour your hot liquid mixture over the layered ingredients, then top off with water as needed, leaving an inch of headspace.
- Process the chili at 10 pounds of pressure for an hour and a half in your p-canner. Be sure to adjust for altitude.
- When serving your chili, be sure to shred the bacon with a fork and stir it in.
Do you like chili?
Do you have any “secret” ingredients we could persuade you to share with us? Please tell us about your chili recipe in the comments section below.
To get these canning recipes and many more, check out my book, The Prepper’s Canning Guide.
About Daisy
Daisy Luther is a coffee-swigging, gun-toting blogger who writes about current events, preparedness, frugality, voluntaryism, and the pursuit of liberty on her website, The Organic Prepper. She is widely republished across alternative media and she curates all the most important news links on her aggregate site, PreppersDailyNews.com.
Daisy is the best-selling author of 4 books and runs a small digital publishing company. She lives in the mountains of Virginia with her family. You can find her on Facebook, Pinterest, and Twitter.










18 Responses
Daisy I have used your chili recipe from your book The Organic Canner and I want to tell everyone who sees this page to know that I have used it to can deer chili year after year and the recipe is 100% successful every single time, and when I give it to my friends and neighbors as gifts or for barter, I get compliments every time! I highly recommend everyone learn to can chili it is always always gonna be better then the store, especially if you use Daisy’s recipes!!
Thank you, Jen! I’m so glad you like it 🙂
These both sound great! Question though, can you use pre-cooked canned beans with an adjustment to the cooking time? And what about TVP? Thanks!
Hi, Miss Kitty – I think you will really enjoy them.
Yes, you can use pre-cooked canned beans but you cannot adjust the cooking time because it is actually processing time. It must be processed for the same amount of time regardless if the beans are pre-cooked. Using beans that have already been cooked my result in a mushier texture.
Regarding TVP, I would definitely not can it. The texture will be awful. What I would do is make the chili meatless and add the TVP at serving time.
I hope this helps 🙂
Is the ground beef also put in the jars raw?
Yes, it’s a raw-packed recipe.
Is this recipe FDA approved? I usually use the ones that are approved in the canning books. They’ve tested them many times, so the thickness, pH, etc are correct. Thanks.
These are my recipes that I created and adapted for canning using times and calculations from the USDA home preservation website.
What about a chili recipe that doesn’t have beans? I like all meat chili-no stomach upset! These do sound good though!
You could double the meat and leave out the beans in any of these 🙂 Use the same processing times.
Texas chili doesn’t have beans so I always serve them on the side along with cheese, sour cream, green onions, and salsa. And I do can my chili.
Found this last year when I first started pressure canning. Love…absolutely…love the chile recipe. Then it was gone from the website. I was in a panic and re found it on Pinterest. Ahhh…saved.
I like to make a roux with butter and flour then add the chili, even though it’s thick, it makes it primo.. I use a medium cast iron skillet, after heating the chili, I make 1/2 recipe of corn bread, drop the batter around the top and bake @ 350 degrees for about 30 minutes. This is one of my most favorite foods! Thank you Daisy ⭐️
Interesting article. I’m still kinda new to canning as I’ve not canned any ready to eat meals yet. So, my question is: in the layering process, does the order of ingredients matter?
Thanks.
Jose, the order doesn’t really matter. I usually put the meat and beans under the other stuff so they’re less likely to float above the liquid. But in reality you can put things in any which way with no problems.
We made the Mexican-Texican Cowboy Chili, but we decided (before making…) that 8 tablespoons of cumin was too much for us, so we only used 4 tablespoons (and that was still pretty powerful). Got my copy of “The Prepper’s Canning Guide” yesterday, and it calls for 3 tablespoons – sounds better! And we will be making more – and the other MRE-type meals as well!
So glad you posted this recipe for chili, as your book ‘The Prepper’s Canning Guide’ list the cumin as 8 CUPS! I kida thought that was a bit much cumin…. Lol ????
Read a few of the other comments and changed it to 3 TBSPs. I think that will suit me a whole lot better.
Thanks Daisy, for all the great recipes in your book….Tutti Fruity and pleasantly Pickled red onions are among my favorites!
Cindy B
What is the layering method. Is the order you listed the order I should put the meat in? I couldn’t find anything about what a layering method is. I ‘m new to this.
Hi, Xiao, and welcome to pressure canning 🙂 The order listed will work just fine. By layering, I simply mean putting an equal amount of the ingredients in each jar. The order doesn’t really matter as it will all mix together when under pressure. Good luck and please let me know how it turns out!