If you're new here, you may want to subscribe to my RSS feed. Thanks for visiting!
One of the best ways to build your healthy stockpile is to preserve local organic foods when they are in season. My favorite way to do this is canning.
When you can your own food, you can make delicious entrees and side dishes that can be served as quickly as you can boil water – and the best part of all is that you know exactly what is in those shiny jars. (See The Canning Manifesto to read more about why I choose to can so many foods!)
Making home-canned foods can be a great way to cost-effectively build your pantry for several reasons:
- You can buy in bulk
- You can take advantage of good sales, like “last day” sales
- You can buy what is in season at better prices than when it is out of season
- You can put together “quick meals” far less expensively than buying processed foods by doing a big batch of home cooking to be reheated and eaten at a later date
- You don’t risk losing your stockpile to the vagaries of the power grid like you would by using your freezer
When my daughter eats a biscuit with jam, I know that it only contains organic peaches and sugar. There are no GMOs lurking, no High Fructose Corn Syrup, and no artificial colors and flavors.
Lots of meals for very little money
You can get a lot of bang for your buck by home canning. I recently canned some “meals in a jar” – check out what I spent:
$10 = 7 quart jars of spaghetti sauce with meatballs
$4 = 6 quart jars of Boston Baked Beans
If you were to purchase those items in grocery store cans you’d be spending far more money for far less quality.
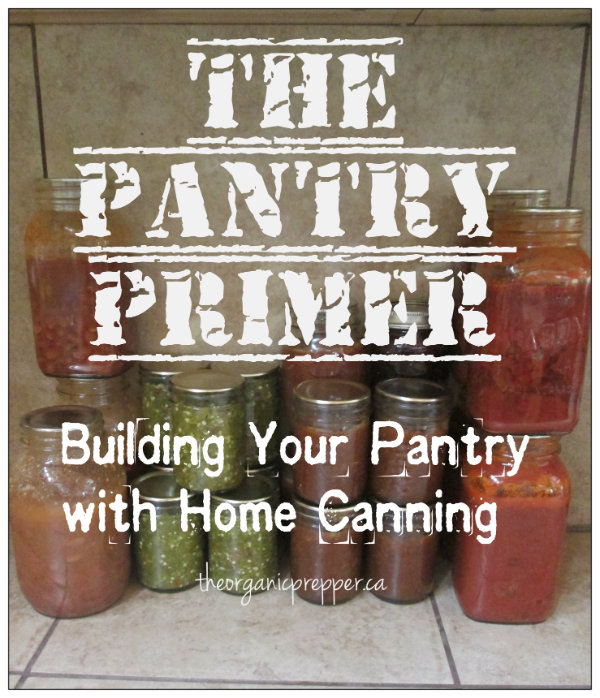
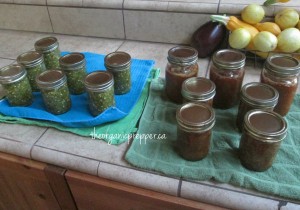
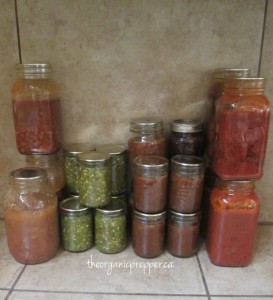
This week I have been concentrating on building my pantry with home-canned goods. I’ve made:
- 7 half pints of jalapeno relish
- 3 pints of brown sugar peach preserves
- 4 half pints of jalapeno peach jam
- 7 quart jars of spaghetti sauce with meatballs
- $4 = 6 quart jars of Boston Baked Beans
- 4 pints of wild blackberry jam
- 4 quarts of pinto beans with bacon
I made all of the above for about $35 not including snap lids and spices, which only add nominally to the cost.
Here are some helpful links:
Go HERE to find tons and tons of my canning recipes and how-tos.
Go HERE to learn about water bath canning.
Go HERE to learn about pressure canning (a necessity if you are canning anything besides fruits, salsa, pickles, and jam).
Go HERE to learn how to sanitize your jars.
Go HERE to learn how to adjust for the altitude where you live.
Also, check out these great websites for more canning ideas:
Ready Nutrition
If you have any questions about canning, please don’t hesitate to ask – canning one of my favorite things to do and I could talk about it endlessly!
Want to learn more? My new book is now available!
Lots of us like to have hard copies of information that we’ve found helpful. Because of this, I’ve expanded on the information included in this series and put it all in one handy primer, available on Amazon.











25 Responses
With my husband’s job being terminated by the end of the year, I have been on a non-stop food preservation roll, and putting up food as “they appear.” I have purchased the produce and fruits from a farm and the grocery store. I am still in the process of freezing eggplant, but have also frozen PYO blueberries. I have dehydrated cherries, apricots, mushrooms,two bushels of green beans and cabbage. I made jam from plums and mangoes, and canned peaches.
I am very interested in your posts concerning pressure canning. I am a bit shy with this tool; I have heard too many fear mongering bits of information. I purchased one because of your “fast food” post. It made a lot of sense to me, and still does. I am planning to use it for meals in a jar as well as putting up rabbit. Do you just heat the food up and eat it? No boiling?
Hi, G!
I was terrified the first time I used my pressure canner. I wouldn’t use it until the kids were at school in case I blew up the house. Many many jars later, I have never had a negative incident. The two things that will cause you a slight bit of alarm are when you put the little regulator gadget on top of the steaming petcock – it makes a bit of a noise and there is steam pouring out of it, but I promise – you aren’t going to burn yourself, and then when your done and it is time to remove the lid. Let the gauge drop all the way to zero and if the regulator gives you any resistance when it’s time to take it off, just leave it alone. The same with removing the lid. If there is still some pressure built up, the lid will not want to come off – it will be pretty much locked on. Don’t force it and don’t try to cool off the canner early by pouring cold water on it or anything.
You don’t need to bring your pressure canned food to a boil because you have already processed it at 240 degrees. Some things call for making a gravy when you open them, and other things are heat and eat. Or in a pinch – open a jar and grab a spoon! 🙂
Please feel free to ask any other questions that you might have! I’m happy to provide p-canning support!
Daisy
Daisy great post. I started with water bath then progressed to the pressure canner. had to figure the times but no problem. im getting very good at all this canning as this year we have canned beef, chicken, pork, and all the veggies we can ever eat. all this for very very low cost. thanks have a great day and god bless. hope to hear from you soon as tomatoes are now coming on ( very little time for much other than picking, peeling and stuffing jars . Wildman out
I swear some of your jars there look square!
That would make for nicer packing.
How come there is so much head room Daisy?
Is it the beans that need that much because they came from the pressure canner?
HalfKin
Hi, HalfKin ~
The headroom is accidental on the beans. Sometimes it seems like they soak up more water and expand more. So I generally just fill the jar about 3/4 full of soaked beans and then put the cooking water to the standard 1 inch of headroom. One day I will figure out the perfect amount for each different type of bean. 🙂
I do have some jars that are a bit more square. They are the Dominion brand from Canada and they’re a bit older. I generally by my jars secondhand.
And I take the rings off because moisture can get trapped under there and it causes the flats to rust, which can cause problems with the seal.
Have fun canning!
Daisy
Daisy. My friend taught me to can my beans like this. Place 1/4 cup sorted beans in quart jar. Fill with water, salt if you wish. No pre-soaking needed. Pressure can 90 minutes. They fill the jar perfectly and are completely cooked through!!
Oh and another thing…
It looks like you take your rings off right away,is this true?
I bought an old All-American (no gasket required, that’s a big plus, I think) the gauge is a bit rusty. For fifteen bucks, I couldn’t pass it up. Should I replace the gauge? Any idea how I would know if it’s gone bad? I mean, will it be ok as long as it does not leak a stream of water?
Also, I’m under the impression canned goods in jars will last forever. Is that a good rule of thumb?
“$4 = 6 quart jars of Boston Baked Beans”
That is a good deal, last time I looked, a quart of anything at my local farmers market costs six bucks!
One more thing, I never see just plain canned green beans with nothing added, or peaches and pears without sugar. Are they just not good sellers, or is there another reason I never see them at the farmers market?
Hi, IAM ~
I would replace the gauge. The reason is, you have to keep the pressure at the proper level for your altitude to kill off the possibility of botulism growing in your home canned goods. I am green with envy – that is a heck of a deal on that All-American!
Home canned goods are considered safe by the USDA for one year. Honestly with food borne illnesses, better to be safe than sorry.
I’ve tried canning fruit without sugar and it wasn’t that good, sadly enough. A light syrup or even juice (like white grape or apple) is far tastier. And we like to put garlic or onions in our canned green beans. 🙂
Happy canning!
Daisy
I started out with the water bath was given a pressure canner as a gift about 20 years ago. Was terrified the first time using it, because when I was a little girl I had a pressure cooker explode on me…bad burns. However, like you many years and jars later no incidents and I’m a happy canner now.
Also,I have canned green beans forever, with nothing but the 1 tsp of salt. And I’m like you Daisy on the dried beans…still trying to figure out the water/bean/head space ratio. But regardless, we absolutely love having meals we prepare in a jar ready to heat-n-serve.
What an amazing resource! Pinning this right now and adding you to my resource page! Thanks for putting this together, it must have taken a long time, but well worth the effort!
Daisy thanks for your inspiration. Freezers full this year as we got 1/2 a beef & 1/2 a pork so am canning more than usual especially the meat. 50 years ago before we had a freezer I had to can everything but when the freezer came along it was much easier to freeze meat & vegies. I still canned a lot of fruit & tomatoes so I wasn’t totally out of synch. Now I’m trying to do more canning so I can learn over again the how toos. I’ve been thinking if we lost power for an extended time I would not like to try to do the learning then. It would be hard enough trying to can a freezer full of stuff if I was well versed in canning. Thanks for all the hints. I’ve been canning green & yellow beans & within the next week I will give corn a try if it continues to get ready. I think I will try to add some green peppers to some of the corn for variety. Do you have any experience with that? Keep up the good work.
Canadagal ~
Corn canned with green and red pepper is just wonderful! It gives a very nice flavor. I recommend you cut the peppers really tiny or in huge chunks that can be easily picked out – the texture will be very soft so one of those options will work better.
~ Daisy
Hi! I browse through your site from time to time and I have a question. I made a batch of canned tomatoes yesterday and I used bigger chunks. My cans have liquid covering most of the tomatoes but there is an inch and some inch and a half of the tomatoes that are not covered in liquid. I prevented this in my next batches but I just would like to know if those 6 quarts are still ok to keep on my rack til winter time. Thanks!
Hi, Amber – there should be no problem at all. Even if the top bits of tomato dry out a little, they will quickly rehydrate when you’re warming up the sauce.
~~ Daisy
my family and I have been trying different things for prepping, I bought some canning jars and I have canned some but when your canning meats and meals is there any thing I should know about what to make them have the most shelf life.
Hi Pat!
Unfortunately there is little that you can do to extend the shelf life of home-canned meats. We plan on using them within the year from the time they are canned. Keep them at a moderate temperature and store them in order of when they were canned – with the oldest ones closest to the front. 🙂
Daisy
Hello pat. I wrap my jars in newspaper and place in boxes stored in a dark cool third bedroom. The boxes as well as the individual jars are dated. My 2 year old meats look like I canned them last week!!
Light will cause your foods to deteriorate faster. Hope this helps!
I downloaded the USDA canning guide, and I believe daisy that in one of your older articles, or maybe Tess’ I can’t remember, there were links to canning resources. I have the files stored on my computer and printed them for my binder.
I was wondering in canning cooked foods and such. Especailly items with meat. How do you you can it, and how long can you store it. And not to be novice but is it safe, I want to can my own food and meals to get away from preprocess foods but I am afraid of mold, and giving my family food posion.
Hi Natasha
Meat must be pressure canned. https://www.theorganicprepper.com/canning-101-pressure-canning-12152012
The best bet is to click on the recipe tab at the top of the page and find something that appeals to you. After you have followed specific instructions a few times, you’ll be more comfortable adapting your own recipes for canning.
Best wishes ~
Daisy
Three days ago I bought a nice Mirro-Matic pressure canner at the weekly auction here for $22.50.
I need to find a manual for it. It is nice and big.
There is a manual that came with it, but it is not for this big canner.
Anyways, I remembered this post and came here to read it again.
Long ago I had a small pressure canner used for cooking meals.
I have never canned, but want to learn.
Thank you Daisy. 🙂
Wow Carol! That is a steal and I am positively green with envy! 😀
Read this to learn more about pressure canning.
https://www.theorganicprepper.com/canning-101-pressure-canning-12152012
It will tell you everything you need to know except for the specs of your device. You might be able to find those online.
Happy canning!
Daisy
Hi Daisy!
First off, thank you for all the information.
Onward, normally I’m not a fan of canning as it kills all the nutrients. What would your informed opinion be on canning for preservation and when the time rises that I want to consume the food, fermenting it?
Thanks in advance.
Stay well, have fun.
Jonathan
About exploding pressure cookers
This was a problem in the late 1940s and early 1950s. After World War II ended, lots of companies re-tooled to respond to pent-up customer demand, and that included some companies that went “cheap” on the metallurgy for their pressure cookers. I’ll never forget my grandmother’s story from that era about her “beans on the kitchen ceiling” after a pressure cooker explosion.
That’s why if you shop thrift stores or garage sales or eBay “deals” and spot a brand of pressure cooker you’ve never heard of, consider the possibility that it may be from that era of exploding pressure cookers that gave the industry a bad name for decades — long after the quality control problem was solved. And a unknown brand name from that era might be very difficult to obtain a fresh rubber seal for it.
About canning versus dehydrating
A commenter above wrote that canning kills the nutrients. Well, not quite. I was riveted to the statement made by Tammy Gangloff (of Dehydrate2Store.com fame) who said that canning preserves about 50% of a plant’s nutrition, but dehydrating correctly preserves about 90%. That was a stunner.
The next issue is shelf life. If canning is intended to preserve foods for about a year, that pales in contrast to properly dehydrated and vacuum sealed foods that when stored so the classic enemies of temperature, light, predators, etc. etc don’t do bad things, you can achieve many years of quality storage.
About sprouts
In addition, there is a mind-bending comparison with sprouting. Sprouts have several times the nutrients compared with the mature plant that usually harvested. So whether you consider canning or dehydrating or sprouts, EITHER approach should put you nutritionally way ahead of preserving the mature plants — which were determined to use up much of that nutrition that the sprouts were making available.
Now there are some gotchas. Some foods don’t dehydrate well, not everybody has a dehydrator and vacuum sealer and the instructions to use both correctly. And there is usually much merit in “making do” with what you have. On the bright side, I’ve never heard any story about an exploding dehydrator….
–Lewis