If you're new here, you may want to subscribe to my RSS feed. Thanks for visiting!
Visit this article and others like it on our new website The Frugalite
In these times of budget cuts, rising food costs, job losses and ever-increasing expenses, we can’t afford to let anything go to waste. In fact, it isn’t far-fetched to consider this our practice run for the tough days that may be ahead. One way to stretch your food budget is with the humble leftover.
Have you ever been really poor?
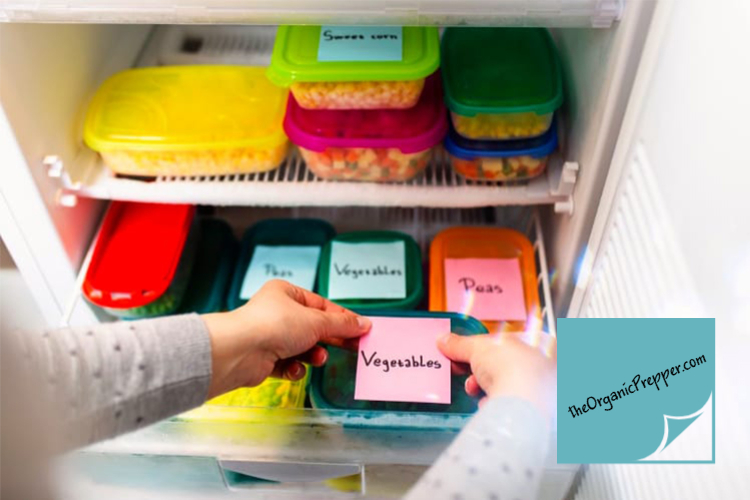
I don’t mean “I can’t afford Starbucks until my next paycheck” poor. I mean “Should I buy food or pay the electric bill before the power gets shut off” poor. I have absolutely been that poor, back when my oldest daughter was a baby. When you are that broke, every single bite of food in the house counts. You cannot afford to let anything go to waste. This is where the “Menage a Leftover” bucket in the freezer comes in.
In our freezer, we kept an ice cream tub. After each meal, those tiny amounts of food that don’t add up to a full serving got popped into the bucket. And because of our situation, I often would take food that was uneaten on a family member’s plate to add into the bucket. Desperate times, desperate measures. What people might consider “gross” in good times, they would feel lucky to have in bad times. Then, usually about once per week, the contents of that bucket in the freezer were turned into a meal.
I drew some criticism from friends and relatives during that time for the distance I went not to waste a single bite of food. A few people commented that it was ridiculous, others thought combining all those different foods in the freezer was disgusting and one person even referred to the meals as “garbage disposal meals”. It stung a little at the time, but looking back, I’m glad to have had that experience. I can draw upon it if times become difficult in the future. While other people are trying to figure out where their next meal is coming from, I know that I can take the same amount of groceries and make at least 2 more meals out of them.
I always considered meals from the leftover bucket to be “free food” because they were items that you’d normally throw out. So, let’s say, you have a little bit of broccoli, some mashed potatoes, some beef gravy, a scoop of ground beef, some corn…you know? The remains of meals. What can you do with that?
This is where being creative with the spices comes in. I might take the above, add a can of beans and a tin of tomato paste, and turn it into a chili-flavored soup. Alternatively, I could stir in some yogurt and some noodles and make it into a creamy casserole, well-seasoned with thyme. I could sprinkle a bit of cheese on it, wrap it in pie crust and make turnovers. The trick is to make something totally new and different from it so that it doesn’t even seem like leftovers. Some of the concoctions were absolutely delicious – so good that we recreated them with fresh ingredients later on. Others were not-so-great. Only a couple of times did we end up with something that was really awful.
If you can serve your family one “freebie” meal per week that results in a savings, for a family of 4, of about $10 – $520 over the course of a year. It doesn’t sound like much until you add it up, does it?
We don’t always do the leftover bucket these days because times are not as tight as they were back then. However, we do creatively use our leftovers. Here are a few ways to remake leftovers into something new and delicious.
RELATED: 3 Ways to Make Food Go Further That Will Help You Now and When the SHTF
Leftover Buffet
We have some nice little oven safe dishes that are divided. We use these on “Leftover Buffet Night.” Simply put, all the items from the fridge are placed on the counter. Everyone takes their divided dish and helps themselves to whatever leftovers they’d like for dinner. The dish is then placed in the oven and heated up – sort of like a “TV Dinner” of choice. Aside from the kids scrapping it out over the last enchilada, this is generally very successful.
Soup
When I don’t have quite enough to make 2 full servings, but it’s a bit more than one serving, I often make soup. I can broth on a regular basis, so it’s an easy thing to grab a jar of broth, chop up the meat and add some vegetables and a grain. You can stretch your soup by adding barley, pasta or rice. If you have fresh bread to serve with it and a little sprinkle of parmesan or cheddar for the top, you have a hot, comforting meal for pennies.
Puree
I use this technique quite often with leftover root veggies. Using a food processor, puree potatoes, carrots, turnips, parsnips or other root vegetables. You can add milk, broth, or even water to thin the puree to the consistency of soup. Season with garlic powder, onion powder and other appropriate spices, and garnish with a tiny amount of bacon, chives, cheese or sour cream. Other vegetables that are suited for puree are cauliflower, broccoli, and squash.
Pie
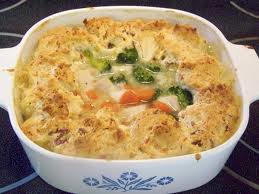
This is a great way to use up leftover meat and gravy. In the bottom of a pie pan or cast iron skillet, stir meat that has been cut into bite-sized pieces with gravy. If you don’t have leftover gravy, a creamy soup, a bechamel sauce, or a thickened broth will work. Add in complimentary vegetables, also in bite sized pieces. We like peas, corn, and carrots with poultry, and green beans, carrots, and potatoes with beef. Add seasoning if needed.
Top your pie with either a standard pie crust, cornbread batter, or with a biscuit dough topping. (2 recipes below) Bake as directed, then allow to cool for about 5 minutes before serving.
For even smaller amounts of leftovers (or picky eaters) you can use individual sized ovenproof containers or ramekins to make single serving “pies”. I’ve also used muffin tins designed for the jumbo muffins to make individual pies. When using a muffin tin, you will want to make it a two crust pie to enclose the filling.
Pockets
If I bake it in a pocket, my kids will eat it. Whether the filling is savory or sweet, there’s something about a piping hot turnover that makes anything delicious.
The key with a pocket is that the filling cannot be too runny. So, for a savory pocket, you can mix a small amount of gravy, tomato sauce or cheese sauce with your meat and/or veggies, but you don’t want it to ooze all over the place as soon as someone takes a bite. If you want to eat this as a handheld food, allow it to cool for at least 15 minutes before eating it.
You can use pie crust or pizza dough for your pockets. Pizza dough is our personal favorite because it is a bit more filling. I make pockets and keep them in the freezer. I take them out the night before and place them in the refrigerator – by noon the pocket is thawed and makes a delicious lunch-box treat at school.
We like pockets with veggies and cheese sauce; meat, mushrooms and gravy; meat and BBQ sauce; pizza toppings, marinara and cheese; and meat and cheese. Another favorite is empanada style: meat flavored with Mexican spices, mixed with salsa, beans and cheese. As well, you can fill pockets with chopped fruit that is topped with either cream cheese or syrup for a dessert-style turnover.
Casseroles
The fact is, you can mix nearly anything with a creamy sauce and top it with a crispy topping and you have a tasty down-home casserole. A basic casserole consists of pre-cooked meat, a veggie, a sauce, a grain and a topping. Bake at approximately 350 for 30-45 minutes until bubbly and the top is browned. The less meat and veggies you have, the more cooked grains you should add. Try barley, quinoa, rice, pasta or wheat berries to stretch your casserole. Instant comfort! For toppings, you can use stale bread that has been finely chopped in the food processor, cheese, crumbled crackers, crumbled cereal, or wheat germ, just to name a few items. I often use things that have perhaps become a bit stale – just another way to use up a food that would otherwise be discarded.
Be creative!
You’re only limited by your imagination when it comes to turning your leftovers into delicious, tasty new meals. Think about your family’s favorite dishes. For us, it is anything in a pocket, pot pies and creamy soups. Therefore, when repurposing my leftovers, I try to frequently gear the meals towards those types of foods. A hint of familiarity makes the meal more easily accepted by those you are feeding.
RELATED: 15 Ways to Prep With Holiday Leftovers
Recipes
Pie Crust
The beauty of my granny’s pie crust recipe is the versatility – you can use what you have. Ideally, I use butter and water for the fat and liquid, however, I have used many different ingredients with excellent results. This recipe makes enough for one double crust pie or two single crust pies.
Ingredients
- 3 cups of flour
- 1 cup of fat (butter, shortening, coconut oil, lard, vegetable oil)
- 2 tsp of salt
- ½ cup of liquid (water, milk, whey)
Directions
- Place your liquid in a dish with a few pieces of ice, if available. Keep this in the refrigerator while you’re combining the other ingredients.
- Combine the flour and salt.
- Cut the butter or fat into tiny pieces and incorporate it into the flour mixture, either with a pastry cutter, a food processor, or a couple of knives. Once the mixture resembles cottage cheese curds, you have combined it sufficiently.
- Add your ice water to the mixture a couple of tablespoons at a time. This is where practice makes perfect – after you make this a couple of times, you will begin to know when it looks and feels “right”. Use a fork to mix this into the dough – if you use your hands you will heat up the
dough too much and the crust won’t be as flaky. - You don’t want to dough to be wet and sticky – you want it to be sort of stringy and lumpy. When you think you have the right consistency, squeeze some dough in your hand – if it stays into a nice firm ball, it’s time to move on to the next step. If it is crumbly and doesn’t stick together, you need more water.
- Make the dough into 2 balls and press them down. Place them, covered, in the refrigerator for at least an hour.
- On a floured surface, roll out the dough with a heavy rolling pin until it is thin but not broken. Fold your circle of dough into quarters and carefully move the dough over to your pie pan.
Bake as per your recipe’s directions or at about 375F for approximately 45 minutes for a two-crust pie or 35 minutes for a one crust pie.
Pizza Dough
Ingredients
- 3 to 3.5 cups of flour
- 1 cup of warm water
- 1 tbsp of sugar
- 2 1/4 tsp of active dry yeast
- 3 tbsp of olive oil
- 1 tsp salt
Directions
- Add olive oil and salt, then stir in the flour until well blended.
- Knead the dough for about 5 minutes, then let it rise, covered, for 30 minutes.
- Preheat the oven to 425F.
- Knead the dough again, then break off balls of dough. Roll them out and cover one half with the desired topping.
- Fold the other half over the topping, moisten edges with water, and press them together with the tines of a fork.
- Place the pocket on a greased baking sheet.
- Once all the pockets are on the baking sheet, brush them lightly with olive oil. If desired season the top with a sprinkle of garlic powder and salt, or whatever herbs are appropriate.
- Bake for 20-25 minutes, or until lightly golden brown.
Biscuit Dough
Ingredients
- 2 cups of flour
- 3 tsp of baking powder
- 1 tsp of salt
- 1 tsp of sugar
- 1/2 cup of milk
- 1 tbsp of white vinegar
- 3 tbsp of cooking oil
- Preheat oven to 425°F.
- Mix milk and vinegar in a small bowl and allow it to sit for about 5 minutes.
- Mix flour, baking powder, sugar and salt in a bowl. Add milk and vinegar mixture, and oil.
- Stir just enough to hold dough together.
- Knead lightly about 10 times on a well-floured surface.
- Pat or roll dough about 1/2-inch thick .
- You can move the dough in one piece over to your pie pan or you can cut circles with a floured drinking glass and place the individual biscuits on the dish you are topping.
- Bake for 15-20 minutes or until golden brown. Top with butter if desired.


20 Responses
I enjoyed that article! All kinds of motivation for getting creative in the kitchen on a budget…..my type of encouragement! I need to alter a couple of those steps due to lack of refrigeration still, but I’m sure leaving dough to rest on the counter, etc. will work perfectly with your easy to follow recipes. Thanks.
Thank you, Barb! I’m glad you liked the article. 🙂
A couple of suggestions for the no-fridge (both of which you probably already know):
Depending on your “critter” situation, you may be able to put some less “smelly” foods in a snowbank on your deck to chill them – this would work well with pie dough.
Second, if you have a room in your house that doesn’t get much heat (our kitchen gets very cold at night since it is down the hall from the fire) you can safely – in my opinion – leave certain items in that room to cool.
Happy cooking!
Daisy
Great article Daisy! And the timing was perfect. Recently had a situation with a family member who is really struggling to feed her big family and facing choices like…do I pay the insurance company this week or keep the lights on? So, I’ve printed this out and will share your tips with her. I’ve given her other suggestions on ways to save at the grocery store and have planted the idea of her doing a garden this spring.
Keep up the great work! Take care…
😀
Great article Daisy – thanks for the tips. I can’t wait to try out those recipes.
Good article…..good ideas
Oh Daisy….just found time to get over to your blog again!!….love all the “tips” Gives me real good ideas for the menus for he rest of the week….and the best thing is that dh will love it! take care, S.
Thanks Daisy! Great ideas. Another thing I have used is the waer from cooking vegeables. Just cool & store in frig. A lot of vitamins & mineral in that water. I can be added to soups, gravy, bread, biscuits etc. Whoops one of my letters not printing & i have tokeep redoing. Better quite.
Good Morning Daisy, First of all I love your site. I know exactly what you are talking about. I remember a conversation I had with a friend once and we were talking about how we grew up….I realized then we were poor. However, we never went without anything we needed. We grew All of our own food…veggies as well as meat. Side note we also heated by wood. Our summers were spent in the fields and canning…preserving our food in some way for the future. We also had a bucket in our freezer for leftovers and yes any uneaten food on our plates. This carried over into my adult life. I knew no other way. You don’t buy groceries for this week, you buy groceries that are on sale and stock up for the future. I went to the farmers market bought the veggies to put up. My boys would do the grocery shopping for me…it consisted of going to the basement and filling my list for that weeks meal plan. Also a great learning tool since I home schooled while they were in grade school. My husband, then now ex, and our circle of friends thought I was strange…who needs all that food in their basement, don’t you get tired of all the work, who wants to invest in that much mustard? Little did they know it was probably free with sales & coupons. Fast forward to when my husband lost his job. I wasn’t worried how we would eat. I remember telling my mom about the job loss, her words to me were you will be fine…you’ve lived through worse and you know what to do, go back to your roots. We made it through and he did thank me for my preparedness.
My kids are now on their own, but my practices are still the same. Just this past weekend, I made soup from the “Leftover Bucket”. I also made turkey stock from leftover carcasses that were in the freezer. I have a separate bucket for fresh veggie scraps and make my own veggie broth.
And my boys, they are now beginning to implement these practices into their lives. My oldest has always hunted, since age 13, and bless his heart I haven’t bought red meat in over 15 years. But last year he got his own freezer and kept one dear for himself. We, my son and future daughter-n-law, have spent several weekends together making chili, soups, etc and canning. It’s awesome to teach them the practices that I learned from my mom and grandmother.
My mother told me once that she never considered the way we lived was anything other than being a good steward of what God had so graciously blessed us with.
I’m sorry for rambling. This is my very first time of ever commenting on any site. I never feel I have much to offer. But your site has been so refreshing to me, because I feel like I’m reading about my life.
Thank you
You aren’t rambling one little bit, Joy! Welcome and I am glad you shared! When people share stories like yours, I like to think that it might help encourage someone new to prepping to get started so they can see the same rewards! 🙂 Hope to see you around frequently! And what an awesome gift to give your DIL – teaching her to can!
Daisy
I agree! I really enjoyed reading your reminiscences of your childhood and upbringing. You should capture those stories on paper or video/recording for your children and future grandchildren.
I never knew how poor we were growing up until after I got married and talking with hubby and his family. I was like no I never did/had such and such. I thank my Mom for that. We had a garden and Dad went hunting. Bought very little groceries at the store. I am relearning how to do all that. When we got married he was very much I want to get from the store kinda guy. He is coming around slowly but progress is progress
Thanks for posting your pie crust, pizza and biscuit dough recipes. I was thinking I had too many leftovers in the fridge and wondering what to do with them. The pizza dough pockets are a great kids’ lunch idea too. I am going to try these recipes this coming weekend.
Hi Bernie! My daughter takes pockets to school for her lunch all the time – apparently, the other kids are jealous that she has the “good lunch”. 🙂
My grandfather served in the ambulance corps during WWI. The cook would save all the leftovers during the week and on Sundays would throw them all in a pot with some water and for their evening meal they had La Soupe. He taught this to me and I often, because there are three of us and many meals I cook are for 4, do the same. I love your idea of putting it all in the freezer and of keeping the stuff that wasn’t eaten off plates.
Daisy. I love your site and read it every day. I find myself in that position of wondering whether or not to pay the electric bill or buy food, and I am a woefully inadequate cook, so this is very helpful. Did i miss about the amount of flour in the pizza dough?
Thanks so much Daisy
Daisy,
I just discovered your site, and absolutely love it. So full of wonderful tips. Thank you, and God bless.
I would love to know the amount of flour to use in the pizza dough! ;D
I can’t thank you enough for this article. Ever since my marriage in 1973, I’ve tried to be a frugal cook. Like you, I’ve gotten a lot of ridicule for my frugal ways, but believe they have helped us afford things we otherwise might have not been able to do. I continue to use most of what you mentioned here & have even gotten a few new ideas. Yes, there will be some concoctions that can be truly labeled as “awful”, such as my “singed ravioli freezer stew”, which has now become a family joke. HINT: NEVER PUT ANYTHING INTO A FUTURE FREEZER STEW THAT EVEN SMELLS OR HINTS OF BEING SINGED!!!! I always save veggie water in the freezer for future stews. And “leftover buffets” are the usual fare at our house. I’ve been amazed at how many different flavored leftovers taste so good together. I know those buffets must be a good thing, when my husband suggests it. Thank you for having the nerve to put into print what many of us have been doing for many years. You are a great encouragement to me….and others who may not admit it. 🙂
we have enjoyed ‘Shepard pie’…this is the weekly fridge cleanout… make up a batch of mashed potatoes…in bottom of casserole dish layer in a thin layer of mashed potatoes…then layer in a cut up bits of leftover meat… potatoes…vegetables…potatoes… meats… until all is used up…then finish with another layer of mashed potatoes and sprinkle with paprika…. bake in oven until all is hot and bubbly… enjoy
ps…you may want to season each layer with a dash of your favorite seasoning
Outstanding article! It’s a keeper in my preparedness file! It reminded me of when I was going to college. I was so poor that I mended broken shoelaces and patched holes in my shoes with cardboard. I survived on venison from the fall deer hunt. (I can’t stomach venison now.)
I always enjoy reading your articles. You’re a very talented writer.
Thanks for sharing.