If you're new here, you may want to subscribe to my RSS feed. Thanks for visiting!
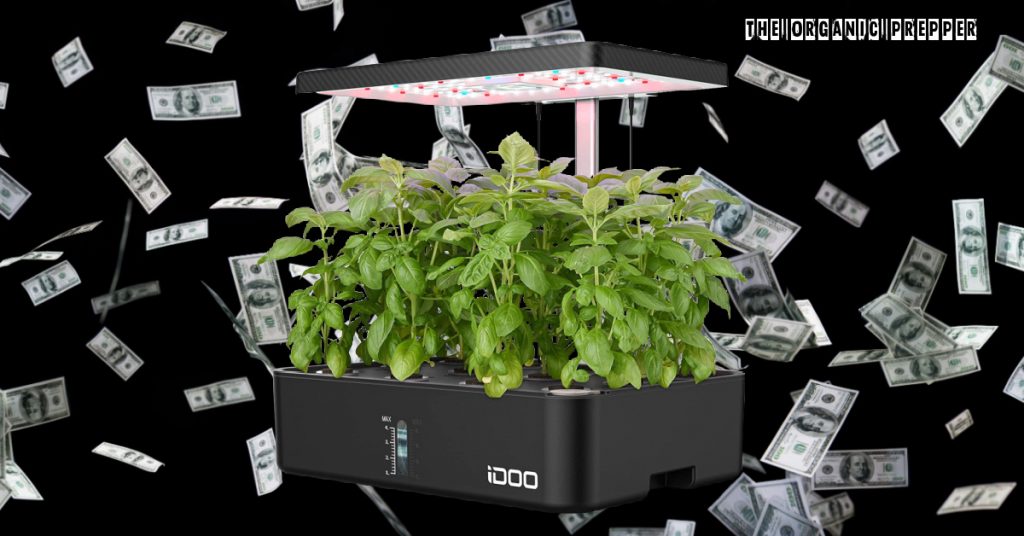
I purchased an IDOO twelve-hole tabletop hydroponics unit back in February of 2022 and recently added a seven-hole unit. My rationale for purchasing an IDOO is simply cost. Aerogardens are very trendy and, therefore, fairly expensive. They do have some nice features, but I didn’t really need a beep to tell me when to add water and nutrients. All I need is the tank, the light, the tabletop, and the pump. So I bought an IDOO. If you’d like to read a comparison of the two, go here. If you’d like to read a review of all Aerogarden models, go here.
My first unit, the twelve-hole model, worked very well the first time.
It was easy to assemble and came with everything required, including nutrient solution, net pots, sponges, plastic domes for humidity, and covers for unused holes. It’s important to keep the light from shining on the nutrient medium because this induces mold.
Mold is bad.
While we’re discussing mold, please note the importance of adding a few drops of hydrogen peroxide to the water. This also helps prevent mold. In two weeks, I had sprouts, and in four, I was harvesting enough for salads and sandwiches every few days. But those tiny bottles of solution wouldn’t last forever, and I wanted an alternative to buying their proprietary mix.

I like the IDOO nutrient solution better than the Aerogarden variety because it contains more nutrients.
Aerogarden’s solution contains NPK, calcium, and magnesium. The IDOO solution contains all of that plus iron, manganese, copper, zinc, and boron. Micronutrients are very important! Right now, I’m using a mix of MasterBlend, Epsom salts (i.e., magnesium sulfate), and calcium sulfate. MasterBlend contains NPK plus magnesium, manganese, copper, iron, zinc, boron, and molybdenum. Let me tell you how I got here.
While researching hydroponic nutrient solutions, I read a very simple recipe: take a few shovels full of compost, add water, let it sit for a few days, and there you are. Given the supply chain problems, I was up for trying a solution using things I had at home, so I shoveled some garden soil into a bucket, added water, and let it sit. When it seemed ready, I filtered out the solids and added it to my tank.
This experiment blew up in my face! My new plantings had no less than three different molds. Even the seeds that sprouted soon died off, and one month later, I still had no harvest. I had thought the soil would contain beneficial microbes to help growth along, but evidently, the pathogens far outnumbered the good guys. I disassembled the unit and bleached everything.
Everything except the pump that is.
I have no excuse for that foolish oversight. I replanted with new everything and got the mold back. When I again took it apart, the pump did indeed have a thick sludge on the bottom. It wasn’t difficult to remove from the housing, and this time it got bleached along with everything else. Today I have good growth one week after planting, and not one speck of mold.
(Want to know how to preserve what you grow with hydroponics? Check out our free QUICKSTART Guide to home canning.)
I learned a couple of lessons the hard way.
If you’re going to try a homebrew nutrient solution, sterilize it. Also, check with a probe or RapiTest to see what you have in the way of nutrients, at least NPK. My probe showed a surprisingly low level. The pH of the solution was fine, however.
Don’t forget the pump when you’re cleaning your unit out.
Whatever seeds you have will work just fine. No need for their proprietary pods. However, I find these units best suited for things like greens and herbs. Root crops will destroy the net pots, and while It’s possible to grow vining things such as peas, you’ll need to light the spaces they travel to. Micro-tomatoes are also a good choice.
I find this perfectly fine as it leaves space in my garden for the bigger stuff, and I can have fresh greens during winter. My grow zone is 5B. We have a short growing season before the snow and subzero temperatures hit.
I ended up buying a second.
So since I like my twelve-hole unit and some of these were on sale for Prime Day, I decided to purchase a seven-hole unit.
This was a matter of shelf space. My unit came, I opened it up, and noticed some interesting differences. For one thing, there’s no convenient window for me to monitor water levels. I have to open the water input and look, then add as required. Thankfully there is a bar directly inside, so I know when I’ve hit max level.
The controls are much simpler and need to be operated manually. The unit doesn’t activate when my timer sends power to it, unlike the larger unit. I have to turn it on. The holes are square rather than round, as are the net pots, sponges, and everything else. My guess is they want to sell more sponges.
The sponges are interchangeable between the two units with a bit of fiddling. If I cut the round sponge down to size, it’ll fit into the square net pot, and if I push a bit, the square sponges will fit into the round net pots. I’ve purchased in quantity, so the sponges cost me $0.20/unit. Rock wool is actually a bit cheaper, but I’d have to cut those squares into pieces suitable to the pot. I’ve used long fiber sphagnum moss with some success.
Remember: your growing media functions to give support only, no nutrients. You could probably even use coco coir or small rocks inside of a small net material as long as the media stays in the pot. One week after planting, I have nice growth and am looking forward to a good harvest. As an aside, I use these for medicinal herbs as well as culinary. I can make yarrow tincture and comfrey salve, but some things like basil are best used fresh.

Don’t stop till you succeed.
I’ve learned a few things the hard way and had some successes and ongoing challenges, but I won’t give up until I succeed.
Do you grow food using hydroponics? What are your thoughts? Do you have tips? Are you saving money? Please share your thoughts in the comments!
(Want uninterrupted access to The Organic Prepper? Check out our paid-subscription newsletter.)
About Amy Allen
Amy Allen is a professional bookworm and student of Life, the Universe, and Everything. She’s also a Master Gardener with a BS in biology, and has been growing food on her small urban lot since 2010.


6 Responses
Nice article!
Thanks for the links
I m experimenting with a few individual pots curently
Go for it! If we help each other learn, we’re all better for it.
We tried to grow indoor herb (grow light and everything) this past spring. Why did it fail? We have a cat.
I have two, and thankfully they mostly stay out of things. It helps to grow some catnip in a different location. A spray bottle filled with water also helped get the idea across.
Relevant articles:
How Do You Make a Hydroponics System Without Electricity?
by HydroKrat | Mar 20, 2020
https://hydrokrat.com/how-do-you-make-a-hydroponics-system-without-electricity/
AND
What to get your hydroponic setup without electricity, 7 July 2021
https://homelyhydroponics.com/hydroponics-without-electricity/
AND
Off Grid Hydroponics – No Electricity Required, By Dorothy Chapman
https://www.familysurvivalplanning.com/off-grid-hydroponics.html
–Lewis
Univ of FL agriculture has a video and short paper on deep water raft (no pump) culture.
https://gardeningsolutions.ifas.ufl.edu/plants/edibles/vegetables/hydroponic-vegetable-gardening.html
They used 20-20-20 fertilizer and Epsom salts for the media.