If you're new here, you may want to subscribe to my RSS feed. Thanks for visiting!
By the author of The Ultimate Guide to Frugal Living and the online course Build a Better Pantry on a Budget
Storing food is more important than ever, but these days we can’t always rely on purchasing food from the grocery store. Canning is awesome, but have you added dehydration to your repertoire yet? Dehydrating food is a great way to store a lot of nutrients in a small space, especially if you use some of the tips in this article to get the most bang for your storage buck.
There are many different ways to dehydrate food. There are minor differences between dehydration and drying. Dehydration uses artificial means to remove moisture, whereas drying uses natural means. The end result is the same, and for the purpose of this article, we’re going to use the terms interchangeably.
- Use a dehydrator. These can range from inexpensive and simple to all the bells and whistles. I recently got this smaller one for my city apartment, and I’m very happy with it. I find that silicone tray liners make my life far easier at clean-up time.
- Use your oven. Set your oven at 145 °F for fruits and veggies and 150 °F for meat jerky.
- Air dry. I use this method for lightweight items like herbs and spices from my garden. I change them in a sunny window in a room without a great deal of humidity. If you are drying outdoors or there are pesky bugs or birds around, you can get a mesh hanging contraption to dry your herbs and keep them pest-free. These remind me a lot of those clothing sorters that hang in the closet that you get for little kids to organize their wardrobes for the school week. You could probably use those, too.
- Sun dry. Much like air drying, you’ll want to protect your food from pests. You can use a piece of light screen for this. Turn your food over halfway through the drying process. Some folks put trays of food they want to sun dry in a hot car for the day.
The method you choose for dehydrating food will vary based on your resources, what you’re drying, and the tools you have available. I recommend you know how to both dry and dehydrate food so you can put things back regardless of your situation.
How do you dehydrate different foods?
The process you use depends a lot on what you’re drying.
Herbs: I like to air dry my herbs. I made a hanging rack out of a small pot rack, but you can also use an existing curtain rod and tie your herbs to it. You just want to make sure the air can circulate all the way around your herbs.
Mushrooms: Wash your mushrooms really well to get all the dirt off. Pat them dry, then slice them thinly. I like to dehydrate mushrooms for a longer time at a lower temperature for the best results. Make sure they’re thoroughly dry before storing them away. If you’ve ever thought about growing your own mushrooms, check out our course here.
Veggies: Most veggies fare better in the dehydrator if you prep them by blanching first. Veggies that don’t require blanching are lighter, like slices of zucchini or greens.
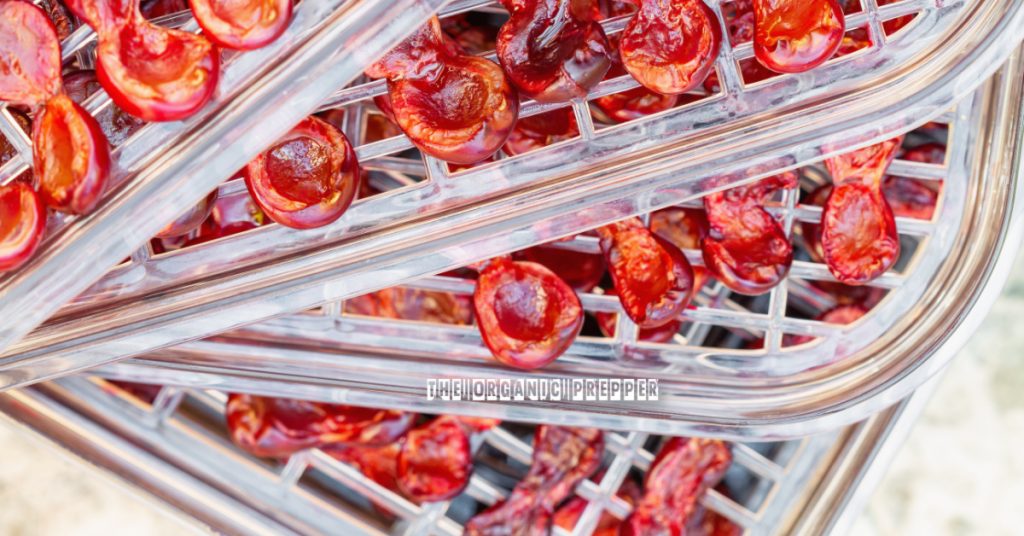
Fruit: I use the dehydrator or the sun for fruit. Slice it thin and evenly and let it get completely dry. If you can squeeze it and feel moisture, it’s not done yet.
Meat: Use meat with as little fat as possible. You can even use leftover meat for this. Thinly slice it and put it in the dehydrator or the oven until all the moisture is removed. Jose wrote about his experiment drying meat without a dehydrator here.
Warnings about dehydrating food
I warn about botulism a lot when writing about canning, but it’s also a valid concern with dehydration. Botulism thrives in a moist, oxygen-free environment. Therefore, I absolutely NEVER store my dehydrated foods with oxygen absorbers.
I might go a little overboard on the level of dryness because I want to be sure there’s no moisture whatsoever in my food. After you dehydrate, put your food in a jar. Then place the lid on it extremely loosely. Shake the contents every day to make sure you’re allowing the last little bits of moisture to leave before closing the jar. If you see moisture building up inside the jar, your contents are not thoroughly dry and need to be processed further. I’m not sure if this is named appropriately, but I call this air-curing.
(Looking for more quality information on food and preparedness? Check out our free QUICKSTART Guide to home canning.)
Fruit and veggie powders
I don’t have tons of space in my urban apartment, so I store a lot of my dehydrated foods as powders. Here’s how I make them:
Once my dehydration process is complete, and I’ve air-cured the product in a jar, I use my handy-dandy food processor to turn the food into a powder. (Don’t be put off by the low price of this little device. I’ve had mine for years and use it regularly.)
When putting the powder into the jar, I use a fine mesh strainer to get any “chunks” out. Then the chunks go back into the food processor until everything has been zapped into a delicious, nutritious, magical powder.
The benefits of storing produce as a powder are many:
- You can easily add a boost of vitamins to any soup or sauce by putting in a scoop of carrot powder, beet powder, mushroom powder, or green powder.
- It takes up very little space to store the same amount of nutrients.
- You can add fruit powder to smoothies and yogurt.
- You can combine multiple fruits together or multiple veggies together.
- These powders add loads of concentrated flavor to your foods.
Be sure to label your powders. You may think that you’ll remember what they are based on color. I learned the hard way (tomatoes in your berry smoothie, anyone?) that it isn’t always that easy.
(Want uninterrupted access to The Organic Prepper? Check out our paid-subscription newsletter.)
Is dehydrating food part of your storage plan?
Do you dehydrate or dry foods for your stockpile? What method do you use? Do you have any additional tips to add regarding dehydrating food? Let’s discuss it in the comments section.
About Daisy
Daisy Luther is a coffee-swigging, adventure-seeking, globe-trotting blogger. She is the founder and publisher of three websites. 1) The Organic Prepper, which is about current events, preparedness, self-reliance, and the pursuit of liberty; 2) The Frugalite, a website with thrifty tips and solutions to help people get a handle on their personal finances without feeling deprived; and 3) PreppersDailyNews.com, an aggregate site where you can find links to all the most important news for those who wish to be prepared. Her work is widely republished across alternative media and she has appeared in many interviews.
Daisy is the best-selling author of 5 traditionally published books, 12 self-published books, and runs a small digital publishing company with PDF guides, printables, and courses at SelfRelianceand Survival.com You can find her on Facebook, Pinterest, Gab, MeWe, Parler, Instagram, and Twitter.


9 Responses
Hey Daisy, yes, I’ve made dehydrating a part of my prepping. Did you know that ground meats, such as turkey and chicken should be cooked before dehydrating? Then drained under hot water to make sure you get all the fats/grease out? Use as lean a ground beef as you can get. Buy frozen veggies when they are on sale, these are usually already blanched. Bought a dehydrator at an Estate sale several months ago, and I started processing several layers of food, meats, veggies, fruits. The process you’re speaking of (air-curing) is also called ‘conditioning’, good article Daisy, I hope more people start doing this.
so if you cookup hamburger, run hot water over it to get rid of grease, you can dehydrate that, put in canning jar, take out the air with the vacuum seal attachment, and that meat will remain edible? wouldnt that be great! I’d love to can meats, stews etc but dont have a pressure canner, afraid of them…if meats could be done with dehydrating, that would be amazing….
Excellent n timely article
Thank you!!
I like your choice of a dehydrator much better than the one I have had for two decades, may be time for a newer one, lol.
You are so right about a mini food processor, they are very handy n save so much space in a tiny kitchen.
Thanks again for this,
Much appreciated!!
Two invaluable resources:
https://www.dehydrate2store.com/
…from whom I learned that dehydrated foods retain some 90% of their nutrients. In contrast, canning foods only retains somewhere in the 50% range.
AND
The Complete Vacuum Sealer Guide, Kindle Edition only,
by Roger Seher, 76 pages, copyright 2011
https://www.amazon.com/Complete-Vacuum-Sealer-Guide-ebook/dp/B004VF6BHQ/ref=sr_1_1
We’ve come a long way since the French in centuries past used to hang foods to sun dry some 30 or more feet up in the air where the breeze would blow any bugs away.
–Lewis
You know I’m really glad you pointed that out, about not adding oxygen absorbers to home-dried goods because of the risk of botulism. I had never thought of that. I live in such a dry climate that I don’t use oxygen absorbers anyway, but if I ever moved to a more humid area it’s something I would have considered. I’ve been dehydrating tomatoes, herbs, and jerky for years, but I guess I still have a few things to learn 🙂 Thanks for the tip!
Drying is a short to medium term answer to food storage.
I do some of this with some foods.
However, drying can’t compete with freeze drying for long term storage.
Yes, freeze dryers are considerably more expensive.
However, the life of freeze dried foods is as long as 25 years – maybe longer.
Use of oxygen absorbers is not a factor in processing with a freeze dryer.
Many foods can be precooked like stew, most vegetables and meat.
This alleviates most of the problems associated with canned food.
Re-hydration and warming is faster and uses less energy than combining and/or cooking individual ingredients.
Another advantage of freeze dried food is weight. A quart jar of nearly any canned food weighs at least 2-1/2 lbs. Four dozen jars is 120 pounds.
Building hefty shelving is imperative.
The same amount of freeze dried food will weight about 20 lbs. – maybe less!
What if you drop a jar of canned fruit (or any food)? Not only do you lose the food but, the mess is difficult to clean up and if clean up is not done thoroughly you will attract insects or vermin.
My grandchildren will eat freeze dried fruit right out of the package which, is much healthier than the crap-snacks found on grocery store shelves.
Finally…
Food packaging is a whole ‘nother subject.
A quality shrink wrapping machine makes things so much easier and actually reduces the size of stored food considerably.
I also made the investment in a freeze dryer – best investment EVER! I store my shorter-term freeze dried food in my kitchen cupboards in half gallon Mason jars. Store them laid down on their sides with an attractive label on their lids. Without having to get your hand in there to grab them at the top of the jar, you can fit a lot of shelves in a cupboard within comfortable reach. By laying them down, you never have to empty out half the cupboard trying to get to the jar you need, which is inevitably at the very back of the shelf. I store most of my long term food in mylar bags, and the 20 year storage food always gets an oxygen absorber. If food is stored in the 2-3 year range, I use my vacuum packager with the Mason jar attachment and a straw to suck the air out of the mylar bag.
I would place the dried food in the freezer to extend the storage time even more. Are there any safety concerns doing this?
I bought an Excalibur dehydrator in the late 90s (though I had to follow up on my order as they’d had a fire – yeah, not a new thing). One kiddo has been using it since said kiddo borrowed it. I doubt it will ever come “home” so may need to bite the bullet and buy another one. Other kiddo lives close by so will be easier to share it. I took advantage of a lot of sales and you just can’t beat snacking on home dried blueberries and strawberries.