If you're new here, you may want to subscribe to my RSS feed. Thanks for visiting!
Author of Be Ready for Anything and Bloom Where You’re Planted online course
When you first start prepping you want everything RIGHT NOW. You look around your home and see nothing but shortcomings. You don’t have enough food, you don’t have a wood stove, you have no secondary water source…that’s it. You and your family are doomed.
You feel a panicked urgency because you’ve learned just enough to know that you are NOT prepared. You know that there are all sorts of supplies that you need, but if you’re like most of us, you’re on a budget. Very few of us can afford to buy everything we need all at once.
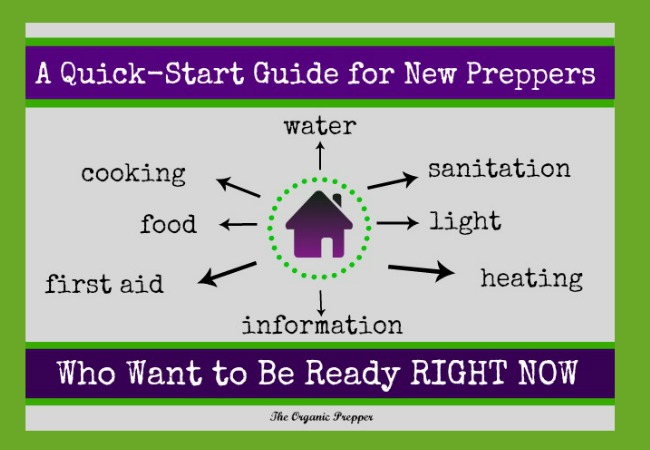
Here’s a guide
Stop panicking. Take a deep breath. You can devote yourself to getting prepared without breaking the bank.
So if you have to split up your purchases, how do you prioritize your supplies? How can you create a sensible supply quickly before an impending crisis occurs?
The recommendations in this guide for new preppers will help speed you through the preparedness process. Wherever possible, use items that you already have. Consider this a checklist of what you need and fulfill it as you can. In each category there will be a range of options, including some freebies whenever possible, as well as reading material on the subject.
Please keep in mind, the following doesn’t provide you with a year’s supply of anything. It will get you through most short-term disasters with aplomb, though. Once you have this foundation in place, you can spend time and money building upon it.
Water
Water is near and dear to my heart, so much so that I wrote a book on the topic. (You can find The Prepper’s Water Survival Guide HERE.) I always put water at the top of the list, because without it, you’ll be dead in 3 short days. The need for an emergency water supply isn’t always the result of a down grid disaster. Recently, we tapped into our emergency water when the well pump broke. Some places have had water emergencies when the municipal supply was contaminated by stuff like industrial spills or agricultural run-off. Floods and bad storms can also sometimes cause the water supply to be tainted.
Use containers you have RIGHT NOW and fill them with water from the tap. Put the lid on and stash them away. Don’t use milk jugs or juice jugs for drinking water, but you can use them for sanitation water in a pinch. If you can get your hands on some empty, clean 2-liter soda bottles, that will be perfect. We don’t drink soda, so we have some of the 1-gallon water bottles from the store.
Buy some filled 5-gallon jugs of purified water. How much you need should be based on the number of family members. The rule of thumb is 1 gallon per person, per day, but you may find you need a lot more than that when you add in pets and sanitation needs. You may be able to find these less expensively, already filled at the store. When I lived in Canada you could pick up a filled jug for less than $10, but California has all sorts of environmental rules that make these containers more expensive here. Another option is the 7-gallon Aquatainer that is designed for easy stacking. (Be sure to put this in a place where the floor can support the weight of a bunch of heavy water containers.)
Have a way to dispense the water from the jugs. We have a top-loading water dispenser for use in emergencies. These MUST be top loading because the bottom-loading ones require electricity to run the pump.) If you don’t want to make that kind of investment, you can get these nifty little pumps for about $12.
Get a gravity-fed water filter. I use a Big Berkey, but it’s a hefty investment when you’re trying to get everything at once. If you can’t swing that, buy Jim Cobb’s Prepper’s Survival Hacks book. It has numerous DIY water filters that you can make without spending a fortune.
Cooking methods
If the power goes out, how will you cook? You need the ability to boil water, at the very least. If you can boil water, then you can heat up canned food or prepare freeze-dried food in an emergency. Here are some secondary cooking methods, some of which you may already have.
Wood stove or fireplace. If you heat with wood, you’re a step ahead already, at least in the midst of a winter power outage. However, you won’t want to fire up the wood stove to cook in the summer, particularly since you may already be battling the heat without a fan or air conditioner.
Gas kitchen stove. Some kitchen stoves that use gas or propane can be used without electricity while others can’t. (If you’re replacing your stove, this is definitely a quality you’ll want to look for.)
Outdoor barbecue. If weather allows, you can fire up your propane or charcoal barbecue during a power outage and cook your feast outdoors.
Rocket stove. There are all sorts of little emergency stoves out there which are designed to boil water quickly and without the use of a great deal of fuel. The Kelly Kettle. You can also make an efficient stove. We made one that brought water to boil in less than 4 minutes. When I went to an urban survival course, we tested out some of the little stoves sold everywhere and found that they’re really not that great.
Do not risk using emergency stoves designed for camping, indoors, unless the manufacturer specifically says that it can be used indoors. To do so is to risk fire, smoke damage, or carbon monoxide poisoning.
Food
Emergency food comes in many different forms. The first thing you have to look at is cooking methods, which we discussed above. The food you choose needs to be able to be prepared using the method you have available now, not the one you plan to get in the future.
Another important note is that your emergency food supply should be nutritious. You won’t want to fill up on empty calories when you may be making greater demands of your body. Keep in mind food restrictions, too, because an emergency situation is bad enough without an allergic reaction or intolerance illness.
There are several different ways to create a food supply.
- See what you have. Go through your kitchen cupboards and see what you already have that could be used in an emergency. Things like nut butters, crackers, and other no-cook snacks are great options. Canned foods that only require heating are good as well. Instant rice or noodles can be added to your emergency supply. Group these items together on a special shelf or in a Rubbermaid container so that they are available when you need them. Figure out how long your supply would last your family before you go and purchase more. Figure out what shelf-stable items you need to add to balance out your supply. (Perhaps dried or canned fruit and vegetables, canned meat, jerky, etc., would provide more nutrients and variety.)
- Emergency buckets. The very fastest way to create an instant food supply is emergency buckets of freeze-dried food, which require only the ability to boil water to prepare. One caveat: do not go with the cheapest thing you can find. Some of those taste absolutely terrible. As well, they’re loaded with unhealthy chemicals and sodium. If you normally eat very healthfully, then move to MSG-laden freeze-dried meals, you’re not going to feel well at all in an emergency.
My very favorite brand of emergency food is Legacy Foods. Legacy has standard buckets of survival food, fruits and vegetables, dairy products, and protein. The quality is very good and the meals are tasty when prepared.
- Build a pantry. This is the best and least expensive way to build a pantry of familiar foods your family already enjoys. Make a list of what you need to feed your family for a month without a trip to the store, and without reliance on long cooking times. (This rules out beans and rice for most people.) Learn more about building a pantry that will see you through a variety of emergencies (including personal financial crises) in my book, The Pantry Primer: A Prepper’s Guide to Whole Food on a Half Price Budget. Also, check out The Prepper’s Book of Lists, a PDF guide you can print off and write on.
Heat
If you live in a cold climate, winter weather during a power outage can be a life-threatening emergency. It’s vital to have the ability to stay warm if the power goes out. Most central heating systems require electricity to run the fan or motors. Here are some options for secondary heat sources if you generally rely on your central heating system.
- Wood Heat: Everyone’s favorite off-grid heating method is a fireplace or wood stove. The fuel is renewable and you have the added bonus of an off-grid cooking method. Unfortunately, if your home doesn’t already have one, it can be a pretty expensive thing to install. If you rent, it’s probably not going to be an option at all to add wood heat to someone else’s property. If you have wood heat, make sure you have a good supply of seasoned firewood that is well-protected from the elements.
- Propane Heaters: There are several propane heaters on the market that do not require electricity. I own a Little Buddy heater
. These small portable heaters are considered safe for indoor use in 49 states. They attach to a small propane canister and use 2 oz. of fuel per hour to make 100 square feet extremely warm and toasty. A battery-operated carbon monoxide alarm
provides an extra measure of safety when using these heaters indoors. If you have a bigger area to heat, this larger unit
will warm up to 200 square feet. Be sure to stock up on propane if this is your back-up heat method.
- Kerosene/Oil Heaters: Kerosene heaters burn a wick for heat, fueled by the addition of heating oil. These heaters really throw out the warmth. A brand new convection kerosene heater like this one
can heat up to 1000 square feet efficiently. When we lived in the city I was lucky enough to have an antique “Perfection” oil heater, which was a charming addition to our decor that was being called into service during grid-down situations. Click here to read more information about the different types of kerosene heaters that are available.
- Natural Gas Fireplaces: Some gas-fueled fireplaces will work when the electrical power goes out – they just won’t blow out heat via the fan.
- Pellet Stove: Most pellet stoves require electricity to run, but there are a few of these high-efficiency beauties that will work without being plugged in
.
If you have no additional heat at all, you can usually keep one room tolerable for 2-3 days. If the cold is relentless and the outage lasts longer than that, you may need to seek other shelter. Watch your temperatures. If the daytime temperature in the house dips below 40 degrees, the nighttime temperature will be even colder, and it won’t be safe to stay there, especially if you have children or family members who are more susceptible to illness.
These methods can help you stay cozier during a storm.
- Heat only one room. One year, our furnace went out the day before Christmas. We huddled into a small room with just one window. We closed the door to the bedroom and used a folded quilt at the bottom to better insulate the room. If you don’t have a door to the room you’ve opted to take shelter in, you can hang heavy quilts or blankets in the doorways to block it off from the rest of the house.
- Cover your windows. You can use a plastic shower curtain and duct tape, topped by a heavy quilt to keep the wind from whistling through your windows. Take down the quilt if it’s sunny outside for some solar gain, then cover it back up as darkness falls. If you have reason to be concerned about OPSEC (OPerational SECurity – keeping your preps private), use heavy black garbage bags to cover the windows to keep light from escaping.
- Light candles. Even the small flames from candles can add warmth to a small area. Be sure to use them safely by keeping them out of the reach of children and housing them in holders that won’t tip over easily.
- Use kerosene lamps. Those charming old-fashioned lamps can also add warmth to the room.
- Use sleeping bags. Cocooning in a sleeping bag conserves body heat better than simply getting under the covers.
- Have a camp-out. This works especially well when you have children because it adds an element of fun to an otherwise stressful situation. Pitch a tent in your closed off room, get inside with a flashlight, and tell stories. When you combine your body heat in a tiny space like that, you’ll stay much warmer.
- Get cooking. If you have a propane or gas stove in the kitchen, your cooking method may not require electricity. So bake a cake, roast a turkey, or simmer a soup. You can use it to warm the room while making a hot, delicious feast.
- Heat some rocks. Do you have a place outdoors for a campfire? If so, put some large rocks around the edges of it. They retain heat for hours. When it’s bedtime, carefully place the rocks into a cast iron Dutch oven and bring this into the room you’re going to be sleeping in. Be sure to protect your floor or surface from the heat of the Dutch oven. The stones will passively emit heat for several hours without the potential of a fire or carbon monoxide poisoning during the night.
Sanitation
Another thing that can quickly become dire is personal sanitation. Depending on your situation, you may not have running water or flushing toilets. You need to stock up on supplies to make the best of these situations and keep family members healthy.
- Baby wipes. You can never have enough baby wipes. Stock up on these for hand-washing after using the bathroom, before and after food prep, and before eating. They can also be used to wipe down surfaces. You can learn more about hand and surface hygiene when there is no running water HERE.
- Cleaning supplies. You still have to keep your home reasonably clean when there is no running water to help prevent illness and disease. You can find some cleaning hacks HERE.
- Personal waste plan. You have to have a plan to deal with personal waste when the toilet won’t flush. This article tells you how to make a human kitty litter toilet, a very inexpensive solution to the personal waste issue. Waste must be handled very carefully to avoid the spread of disease and illness.
Here are the items I recommend that you keep on hand for water emergencies:
- Disposable disinfecting wipes
- Super absorbent paper towels
- Basins (This is a great deal on a 12-pack of dishpans. You’ll find a million uses for them!)
- Baby wipes (These can be used for hand washing and personal hygiene. We use this brand because it is free from many of the toxic additives of regular baby wipes.)
- Your regular spray cleaner (Ours is vinegar and orange essential oil)
- Kitty litter. This soaks up messes and helps to absorb odor. (If your toilet won’t flush because you’re on a city sewer system, it can also be used as a makeshift toilet. This serious concern is discussed here.)
Light
Lighting is absolutely vital, especially if there are children in the house. Nothing is more frightening than being completely in the dark during a stressful situation. Fortunately, it’s one of the easiest things to plan for, as well as one of the least expensive.
Some lighting solutions are:
- Garden stake solar lights
- Long-burning candles
- Kerosene lamp
and fuel
- Flashlights
(don’t forget batteries)
- Hand crank/solar lantern
- Don’t forget matches or lighters
Tools and supplies
Some basic items will make your life much easier during an emergency. Here are some things that are essential in the event of a power outage:
- Lighter/waterproof matches
- Batteries in various sizes
- Manual can opener
- Basic tools: Pliers, screwdriver, wrench, hammer
- Duct tape
- Super glue
- Sewing kit
- Bungee cords
If you’d like to expand on the basic supplies, a more detailed list of tools and hardware can be found HERE.
First Aid kit
It’s important to have a basic first aid kit on hand at all times, but particularly in the event of an emergency. Your kit should include basic wound care items like bandages, antibiotic ointments, and sprays. As well, if you use them, keep on hand a supply of basic over-the-counter medications, like pain relief capsules, cold medicine, cough syrup, anti-nausea pills, and allergy medication. Be sure to have a couple of good medical guides on hand. I like this first aid book, this medical book, and this book of natural remedies.
If you want to put together a more advanced medical kit, you can find a list HERE.
Special needs
This is something that will be unique to every family. Consider the things that are needed on a daily basis in your household. It might be prescription medications, diapers, or special foods. If you have pets, you’ll need supplies for them too. The best way to figure out what you need is to jot things down as you use them over the course of a week or so.
Other Stuff
As you continue along your preparedness journey, you’ll find that there are other items that are very important to you. For example, you’ll want to build a bug-out bag for possible evacuations.
And don’t be surprised when this mindset creates within you the itch to be more self-reliant, which means you’ll be adding gardening tools, sewing supplies, woodworking tools, and other supplies to your stockpile.
Another aspect of preparedness that is often overlooked at the beginning of the journey is the ability to protect your home and family. If you aren’t already of this mindset, the idea of bringing home a firearm can be overwhelming. When you’re ready to learn more about personal protection and home defense, go HERE and read this article.
Add These to Your Library
Hard copy books are excellent references. I recommend that newbie preppers purchase the following to keep them motivated to become more prepared.
- The Prepper’s Blueprint
- The Prepper’s Water Survival Guide
- Prepper’s Survival Hacks
- The Pantry Primer: A Prepper’s Guide to Whole Food on a Half Price Budget
- Prepper’s Natural Medicine
- First Aid Fundamentals for Survival
You’ve got this!
You’re going to do some list-writing, so grab a notebook and pen.
- Write a master list. Now, based on this article, go through and write a list of the things that you feel are important for your family’s preparedness plan. Include the things that you already have. Organize your list by checking off the things you have.
- Organize the supplies that you have into “kits”. I have Rubbermaid tubs labeled with the contents for emergency purposes, sorted into kits for things like pandemic supplies, off-grid lighting, batteries and power supplies, etc.
- Now write a minimalist list of the first things that you must have for survival. Don’t worry if you can’t get everything at once. Start off by covering all of the bases with a skeleton kit that will get you by. This list might include some food that doesn’t require cooking (thus eliminating the immediate need for a secondary cooking method), a way to keep warm, water, a kitty litter toilet, and some baby wipes.
- Finally, write the big list. This is a list of the things mentioned in the article that you want to own. Make a copy of the list and keep it in your wallet so that if you happen by a thrift store or yard sale, you know what you need. As your budget allows, pick up one or two of these items per week. These may be higher ticket items so don’t worry if it takes you a while to get them. You’ve gotten the bare necessities, so these items will just add to your already sturdy foundation of preparedness.
Don’t panic. Start with your basics in each category and add to it as your time and budget allow.
If you want to get started, here’s a guide to help you get prepped no matter where you live: The Prepper’s Workbook
Calling All Preppers
What would you add to this list for those who are just getting started out? What words of encouragement do you have for those who are just beginning? Please share your best beginner prepper advice in the comments below.









21 Responses
You can use the water in your basin you used to wash dishes to flush out the toilet once a day.
Thanks for the nice checklist! I completely agree with you about water. I think we often don’t talk enough or accurately enough about water, sanitation, and what it would really be like to survive long term without social infrastructure. So much discussion is about paramilitary considerations and glorious bad-ass-ness rather than what the real work of survival is. I also wonder why there’s not more discussion of passive solar techniques, like passive solar air and water heaters, solar therm energy, and so on. Cheap, easy to make and maintain, and a great way to capture heat for a variety of purposes. Also, it seems like lots of folks are gonzo for generators. Generators are signal flares, require long-term maintenance and parts, and need fuel — which will rapidly become in very short supply. Anyway, I could go on ranting. Really, I just wanted to say thanks for what you do 😉
Excellent check list! I agree water is a priority.
Setting up some rain gutters to deter water into rain barrels is an easy and inexpensive way to build your water supply. We use rain water on the garden. The rain water can also be filtered for drinking or cooking.
Excellent advice about keeping items organized, so you know what you have and where it is when the item is needed.
My man and I lived aboard our 36 ft sailboat for 14 years. We learned many many lessons about being prepared for anything. I find living in a cabin is far more challenging! But I always have kitty litter and extra water. When the wind starts to blow I fill the bathtub (for flushing the toilet and to use for dish washing)I save my jugged water for washing bodies and drinking. One of the hardest things for me to learn is to be certain the pantry is gone through 2x a year to keep things clean and fresh and to use dated items before the pull date.
A metal trash can & lid lined with cardboard to make and inexpensive Faraday cage in case of an EMP attack. I keep my solar powered hand crank radio, solar inverters, charge controllers, and a battery operated fan, and other electronic gadgets that need protection from an EMP. You can buy inexpensive solar power systems from Harbor Freight. They might not be top of the line but the work and could give you some dignity in the dark should it become nesasary. We have calculated that we could at least plug in one appliance at a time. (Aka unplug the freezer to do a load of laundry) on a bank of 4 marine batteries that can be recharged each day if one has sunshine.
Great list! Quick question. The other day I read something about “canning” water. It mentioned not using metal lids (????). I understand rust… but what else would I use? I had old pickle jars. I sanitized them (and the lids)… then filled them with filtered water (reverse osmosis) that I boiled. Is this an appropriate way? I know it’s not “canning”, but it’s what I can do at this point. We don’t drink soda, so all I have is glass. Just concerned I wasted water and time if I’m not doing it right! Thanks!!
Canning water and using lids will NOT result in “rust”. What I do is put jars of water in the canner or boiling water bath when there is extra room…when I don’t have enough jars of food to fill the boiler. Those are the ones I would use for cooking and drinking. As for the toilet and bathing, I have cats so buy the plastic jugs of litter, rinse them out using some bleach, fill with water, and store in my basement. Once a year, I use that “old” water on my garden in dry times, refill, and store again. I’ve never had one leak over five years of using the jugs.
Additionally, not water related, but in the winter I cover the inside of my windows (over the trim) with heavy duty clear plastic from JoAnn Fabric shop. I heat with wood, and we have heavy winter winds and snow here. In the spring/summer, I use the same plastic to solarize areas of the garden that might be weedy. Afterwards, I just wash the plastic and reuse for the winter window coverings…. have used the same plastic for four winters/summers.
Put a roll of toilet paper in a tin can (big coffee can.) Fill with alcohol ( 90% ) is better. .lite with a match … use for heat. ..put lid on to put out.
Entertainment. Coloring books and paper, crayons and colored pencils Several decks of cards, chess and checkers, appropriate books and kindles,board games.
I read every “prepper” post I see. Re: water storage, I have never seen the suggestion that a home’s hot water heaters can provide anywhere from 40 – 100+ gallons of water. My 2 (one – 50gal, the other – 40gal.) are in the attic, which would allow easy dispensing of water. I drain each yearly to remove deposits that settle to the bottom. I turn the gas to “Pilot”; hook a garden hose to the faucet; vent the tank and the water flows.
Where did you get your information? I am very suspicious this a scam.
You’re sure that advice on prepping is a scam? Ummmm….got my information from the school of life, I suppose. 🙂
I can understand how some people would think that things like this could be scam in order to just be able to sell things. This site is not like that! From the sounds of it you have been lucky and very blessed to not have had to live through a natural disaster. I can assure you as someone that has not only had to live without electricity, running water and only able to get enough food for 2 people when there are 4 people in the house and 2 of them are toddlers, once a day for a whole freaking month (having to rely on the national guard to bring food to a certain spot in town because of the crowds) that this information that Daisy is posting about could not only save your life but also the lives of your family. I wish that I could have had access to something like this years ago before the natural disaster (hurricane in my case) struck so that way we could have been better prepared and not have had to worry about making sure that there was enough food and water and a way to be able to cook that food for all of us. my two children are teenagers now who remember that time and are with me in learning everything that they can in order to not ever have to go through that again. I hope and pray that you never have to experience anything like that. With that being said her site is here to help people that want to learn so that way they are prepared.
To add on to the mention of water, having bleach on hand can be a life saver as well when it comes to purifying water. For one gallon of water 8 drops of bleach can be used to purify it, I personally also boil the water and then do the bleach just to make sure that it will be okay for everyone to drink.
In several places, propane is mentioned as a useful fuel for cooking and staying warm. While this is true, there are some extreme safety hazards that need to be known — especially by any beginner who may be overwhelmed by the complexities of prepping.
Check out this article on propane storage safety tips:
https://restorationmasterfinder.com/restoration/propane-tank-storage-safety-tips/
Excerpt:
“…if they are stored incorrectly, they could become a serious fire hazard. In fact, just one propane tank can blow up an entire house…”
What a propane supplier may not mention is that a leaking or overfilled propane tank can present a severe hazard, but even a propane tank in excellent condition can invalidate your home owner’s insurance policy if the tank causes a fire, or blows up during a house fire — typically because it wasn’t stored correctly some distance away from the house. I’ve read that 30 feet is a typical minimum, but a propane user would need to know from their insurance agent what minimum distance they require.
At all costs, the user must avoid the explosion hazard to both home dwellers and to fire fighters who might be called in to save lives.
This presents a big problem for apartment or condo dwellers who may not have off-site storage available, or to townhouse dwellers with the same problem. Even some typical homeowners might have a small enough yard without enough distance to safely store propane bottles. All such issues need to factor in to one’s choice of fuels for long term preparedness.
I happen to be a fan of denatured alcohol and cleaned kerosene. Neither ever deteriorates in storage nor risks explosion. Commercial chefs often use alcohol burners for warming / chafing dishes. Swedish army soldier mess kits used a drop-in alcohol burner from Trangia to cook meals. The German Petromax portable stove would burn virtually any liquid fuel, although they warn against using gasoline. In the 1930s, once Prohibition was lifted, workers routinely carried portable alcohol burners (some were DIY) with them to heat up meals on remote job sites.
Equipment catalogs catering to Amish communities still carry kerosene stoves for cooking and/or heating, as do some preparedness suppliers.
In making one’s choices of fuels, these two links are helpful.
https://modernsurvivalblog.com/preps/stoves/
http://www.ldsliving.com/Safely-Stored-Fuel-Is-a-Preparedness-Essential/s/66120
–Lewis
I agree, water is the very first consideration. Liquid chlorine bleach in jugs is not the best option, as it has a shelf life of about 6 months. (I just poured 2-1/2 gallons of aged bleach down the city drain. I never use it for laundry.). Better choices are LifeStraw and chlorine tablets from camping stores. Also research “how to distill water” for a method of purifying water with a bowl inside a large pan.
Other ways to cook: A solar oven. An outdoor fire bowl with a rack. Cans of sterno with a chafing dish or other appropriate holder/burner.
The important thing for those just starting out is — to start. You don’t have to bankrupt yourself by doing it all in the first week. Buy an extra can of something when you shop. Buy a pack of lighters at the hardware or discount store. But start with water!
As always a great article for those open and willing to learn from another’s experience Daisy! I love that you specifically mentioned the Kelly Kettle. I recently added the “Base Camp” kit to my preps and wish I had heard of it years earlier. This one small item ensures I can boil water and cook without ever running out of fuel, and best of all I don’t have to carry or replace fuel because it’s everywhere.
Thanks again for keeping the basics up front and on point.
About a mirror in your kit for signaling: What’s not discussed is why the US military supplies survival signaling mirrors with a tiny hole in the center. It makes aiming sunlight at your target so much easier and precisely. Ordinary retail mirrors don’t have that hole, but there are some specialty signal mirrors that do. Or, the small Boy Scout steel mirrors can be used if you drill an 1/8th inch diameter hole in the center. Here’s an article on how to use such signal mirrors, and it does have an Amazon link for a ready-to-go glass signal mirror:
http://www.survivalnewsonline.com/index.php/2011/11/how-to-use-an-emergency-signaling-mirror/
About solar cooking: your latitude and location matter — as to what percentage of the year you have sunny days. Anyone can run an internet search that asks “How many sunny days are there in [city, state — nearest to where you live] in a year? That will tell you at an absolute minimum how many non-sunny days you need to plan for other kinds of cooking, boiling or heating fuel. So think of solar cookers as a way of vastly expanding on your capabilities, over what would otherwise cost you money or effort for petroleum or wood fuels.
Also, different kinds of solar gadgets have their own best capabilities. A solar oven might be an excellent slow cooker, but a large free Fresnel lens scavenged from a discarded rear projection TV can boil water very quickly, or do slower cooking if you adjust to a milder focus position AND wear strong eye-protective goggles. Some Fresnel lenses are UV protected, and some are not — which presents a longevity problem.
A parabolic mirror style solar cooker can also work, but typically the biggest ones are usually too large for portability. Smaller ones work for vehicle traveling, and even smaller fold-up umbrella-style designs (available from Asia, or DIY your own) have been used by world travelers for a long time.
These are the basic types of solar cookers:
Panel
Box
Parabolic
Double glass tube (with vacuum in-between) using reflector panels to concentrate sun heat.
Large Fresnel lens cookers
References:
https://insteading.com/blog/solar-cooker/
https://solarcooking.fandom.com/wiki/Solar_Cooking_Wiki_(Home)
and YouTube is full of examples and demos.
Finally, not all solar gadgets are cookers. The design in Sharon Buydens’ book on Amazon is about how to make your own slant-glass top pool table style passive solar water distiller. A discarded sliding glass door makes the perfect top for one. Here’s that book:
DIY: How to Build a Solar Water Distiller: Do It Yourself – Make a Solar Still to Purify H20 Without Electricity or Water Pressure Paperback – September 4, 2015, 142 pages, by Sharon Buydens
https://www.amazon.com/DIY-Distiller-Yourself-Electricity-Pressure/dp/1517216680/ref=sr_1_3?keywords=sharon+buydens&qid=1559154835&s=books&sr=1-3
—Lewis
Only one comment. Make sure your pipes don’t freeze up and crack if you only heat one room.
I have to disagree on the stoves section: any time you cook with an open flame indoors, you have a carbon-monoxide threat. That includes a common kitchen gas stove, Kelly kettle, Volcano 3-way stove, any open flame. A properly maintained and used camping stove is no more dangerous than any of these others.
I have often used a camping stove, an Optimus 8-R, indoors. It uses white gas. That particular stove is no longer made, but a similar one called the Optimus Svea is still made. I now have one of each, as well as a tiny wood stove that burns twigs and leaves.
The safe indoor operation of any open-flame device, and that includes kerosene lamps, requires a “leaky” house that allows exhaust to escape and fresh air to enter. If your house is as tight as a drum, even breathing can become dangerous. So use common sense, make sure that you have a way for fresh air to enter and a way for exhaust escape, before using any open flame device.
The same dangers apply to all the heaters mentioned in this article.
On another issue, rice is super-easy to cook. I just put a half cup of brown rice, along with slightly more than a cup and a half water, in a small pan, bring it to a boil, then pour it into a 16 ounce wide-mouth Thermos and cap it. A few hours later, the rice is still hot, and cooked. That makes about four servings. I wonder if beans could be cooked just as easily, if they are ground to a flour first. The only heating needed is what’s used to bring the contents of the pan to a boil, no long-term simmering.
I wonder how many other foods that normally require long cooking times can be cooked the same way?
Fascinating idea. I never thought of cooking rice this way. So why not noodles? Or potatoes? In a camping scenario, with but one burner to cook on, this would get the rice or noodles out of the way and make the burner available for something else. And you might be able to start some food at noon, let it cook in the car while you drive to your bug-out location, and have it ready for supper. Maybe I’ll ask Santa for a Thermos for Christmas. I feel the itch to experiment coming over me. Why is my wife rolling her eyes?
I’ve found that most food bucket “servings” are very light on calories.
As for lighting, we found that tea candles and some foil throw off enough light to make a room more homey.