If you're new here, you may want to subscribe to my RSS feed. Thanks for visiting!
By Rowan O’Malley
As someone who lives in USDA climate zone 4, where temperatures dip down to -30F, I take winter seriously. Each fall, when winter looms, yes, I am thinking about the usual homestead tasks of preparing firewood and making sure the woodstove is ready for burning. However, I am also getting ready to survive the winter without grocery stores. Now, so far, the grocery stores have continued to operate, but you never know.
Although, in the long term, I would love to dig and build a proper root cellar, I don’t have one now. I know that OP readers are in different circumstances in terms of where they live and whether they have a root cellar or not, so I thought I would share a few of my tips on the different creative “layers” of fresh vegetables that I have ready to eat over the winter.
All of this can be done without a root cellar. I am in a very small space of just under 500 square feet. Rather than add solutions like a big chest freezer to the mix, I prefer finding solutions that blend with what I’m already doing and don’t add any dependency to the electrical grid.
Layer 1: Packing Available Fridge Space
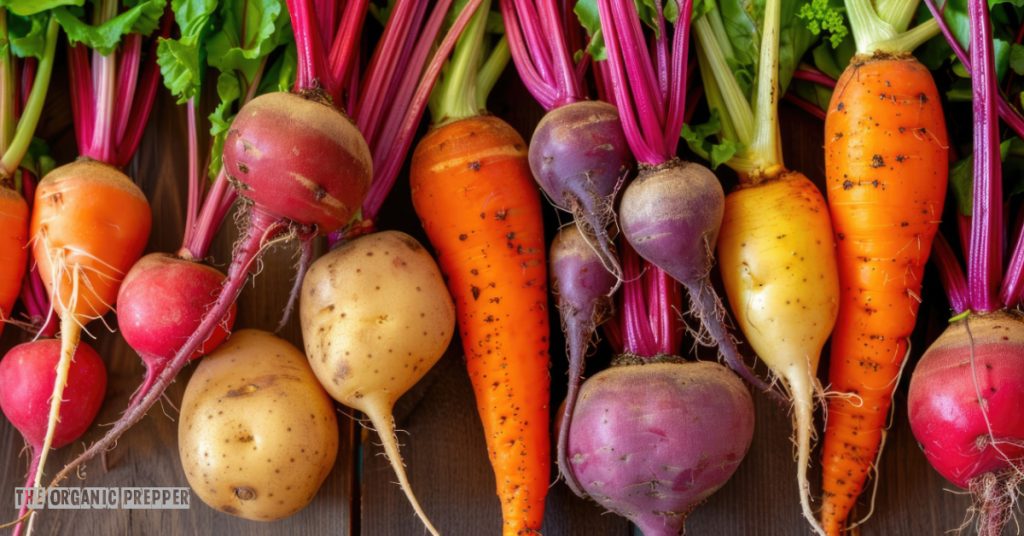
My first layer is one that is available to most folks: the refrigerator. In fact, my fridge capacity is pretty small, but I still find space to pack in some extra root vegetables in there when the sales are on in the fall. This particular year, I had a smaller garden myself and participated in a community garden that gave a lot of food away. So, when the harvest season came, I picked up bulk carrots, beets, and sweet potatoes for an amazing price. I mixed in a few of my own late beets, too.
That was at least a couple of months ago now, and I was able to reach into the fridge to get some carrots and beets in perfect condition to make a soup last night. I used two methods: storing some in the original plastic ventilated bag that the bulk carrots came in. Some other beets, I wrapped in a damp tea towel and stored in another area of my small fridge.
Every once in a while, I take them out to check on them and I might rinse them in water to keep them damp, as the fridge can dry things out. When they are protected from drying out/getting too wet and well-tended, I have found that root vegetables can last months in the fridge.
There’s another benefit of filling unused space in your fridge, too: it is more efficient than empty space and could save you a bit on your electricity bill.
Layer 2: Use What Ya Got
One corner of my cabin is fairly cool. It doesn’t get the daytime sun. Although it is nowhere cold enough to be a real root cellar, it is surprising how well I do with it. The storage temperature recommended for root vegetables is just over freezing, from 32 to 40 degrees F. My “cold” room is more like 50 degrees F in the depth of winter on the floor.
The humidity recommended for storing root vegetables is very high, around 90 to 95 percent. Depending on whether I’m running the woodstove, the humidity in my “cold” room will vary between 40 and 70 percent. Not sure what you’re dealing with in your own place? I bought a few small thermometers and humidity meters for just a few bucks each.
In my own experience, if I compensate for the low humidity, I can store root vegetables in my “cold” room much longer than you might expect. To do this, I store them in cardboard boxes that are low and filled with damp shavings. That way, they are getting the maximum cold from the floor and are kept damp enough to keep longer.
The secret is in the balance: make the shavings too wet, and they will turn to mush. Too dry and they will shrivel. I find that the cardboard boxes work better than plastic buckets because the cardboard breathes. This does require you to check on them. Sometimes, I will dampen the top of them with a mister and check how the veggies are doing in there. I also have stored potatoes this way. I have been able to store veggies this way and have them last almost until spring. The secret is to monitor them and keep them suitably damp. I did try sand and have found that shavings work much better for me.
In a bin on the floor of my cold room, I also have almost a dozen winter squash. What a great survival food! In fact, the conditions of my cold room are pretty close to the ideal for these squash, and they will regularly make it until spring and even until May in there.
Layer 3: The Great Outdoors!
When I wanted some fresh kale for my soup this week, did I go to the grocery store? Heck no! (Especially with what they charge for organic kale!) I just went to the raised bed of our community garden, where I put some kale and Swiss chard plants into hibernation….literally!
When our hard frost was looming, I layered straw around the base of the plants. Then, I just popped a large clear plastic bin on top of the plants and held it in place with a sizeable rock on top. Is this a mini greenhouse? Nope. These plants are not going to grow in these conditions, but they do stay alive. I can pick what greens I need by just removing the bin. More healthy greens will be there…week after week.
Plants most suitable for this preservation method would be some of the hardiest kales, like Siberian, Russian, or Winterbor. This would also work best with kale plants that grow low to the ground so that the straw can protect them well, and you don’t need too high of a bin to cover them properly. An added bonus is that, when spring comes, you have kale plants ready to go. Cut back their flowers to keep them producing as long as possible, or let them go to seed if you want to seed save.
Layers of Veggies for Winter Survival: Yum Yum!
These are simple low-cost preps that can extend your survival in winter SHTF, and can help out your grocery budget through the lean months of winter.
What layers of veggie preservation, if any, do you use related specifically to winter survival? Do you have one of your own that you can share with us? Please tell us in the comments section!
About Rowan
Rowan O’Malley is a fourth-generation Irish American who loves all things green: plants (especially shamrocks), trees, herbs, and weeds! She challenges herself daily to live her best life and to be as fit, healthy, and prepared as possible!


5 Responses
It’s really good to read about practical, low cost/no cost solutions, rather than the “buy a freeze dryer” or “buy a freezer and whole house generator” type advice.
I like the use-what-ya-got approach and mindset! Thanks!
I live in the Mohave desert in NW AZ. Our winters are mild, though temps do dip into the low 20’s on rare occasions. I have raised beds in which I can grow cold weather veggies all winter long with no additional heating required. My beds have PVC hoops roughly 4 feet tall and 4 feet wide over them. The hoops are covered with bird netting year round (mostly to keep the Gambel Quail out–since they are two-legged goats). During the depth of winter I also cover them with Agribond row cover material or (less often) 6 mil plastic. If temps are expected to drop below 25 I place gallon milk jugs in the beds. They absorb the sun’s heat during the daylight hours and radiate it back out at night. I’ve only had to do that a couple of times in the past dozen years. Currently (12/26/24) my Dwarf White Sugar snow peas are blooming and forming peas, Jericho lettuce and Red Ice lettuce are producing, Matador Spinach, Bright Lights Swiss Chard, Bok Choi and Red Russian Kale are thriving, as are my Kuroda and Scarlett Nantes carrots. Detroit Dark Red beets and Purple Top White Globe turnips are also doing well. De Ciccio broccoli is up and growing nicely but won’t form heads until late next month.
Oh, and it’s been so mild this winter I’m still harvesting tomatoes (Wapsipinicon Peach and Bush Champion slicers, Gardener’s Delight, Super sweet 100, Sugar Rush and Peacevine cherries).
I found that placing potatoes separately (grown locally) in lunch size brown
bags, rolling them up tightly and then placed together in a larger brown paper bag and stored in the coolest corner of my cabin seems to work well. It has been 3 months and they are still nice and firm with no sprouts. Our water table is at 3 feet so a root cellar is out of the question. I have experimented with, straw and sand and neither worked for this environment. I have also found that Bok Choy, brussels sprouts, cabbage and broccoli ( store bought) also last an inordinate amount of time if bagged tightly and kept separated .
I use a cardboard box and layer potatoes in rice. Garden potatoes seem to last longer but store bought lasts about 2 months before they get soft. I’m fortunate to have a basement with an unfinished section to store them.